Thought it would be fun to do a process post just to change things up a little.
I have a commission to make four 36" by 45" pieces of cotton Shibori striped at 6 to 8 inch intervals.
Shibori tends to be a little surprising so in order to keep the four pieces as similar as possible I will make the folds and dye application very consistant.
To create the Stripe
For this project I will be activating the dyes rather than the fabric so the first step is to prewash the fabric and then cut it to length and press it flat.
I then marked it at the width I decided would work best. I chose 7.25 inches, it is within the range asked for and should leave me a little extra room for the dye to soak into the fabric without closing up the stripes too much.

Next the fabric was pressed into pleats
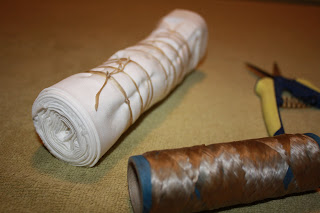
 Then it was rolled into a log. Rolling the fabric creates small wrinkles and distortions that will be at a right angle to the stripe. This will make the line fluctuate slightly, its a bit more visually interesting than a straight line. Nothing against straight lines you understand, but shibori probably isn't the best way to achieve them.
 Finally I bound the logs, and wrapped them in plastic wrap that is a little shorter than the length of the logs. This will protect the white areas from fingerprints, smudges and splashes. I tied the Plastic down too, creating another resist to stop the dye from running and giving me a visual aid to judge the dye process.

2 comments:
wow, i never think about the engineering part of this....
My favorite kind of post--a process post!
Am most anxious to see the final result. I will probably lust after it!
Post a Comment