Wednesday, February 6, 2008

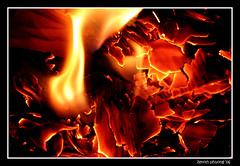
feels like fire


feels like fire
Originally uploaded by Zenith Phuong

This gorgeous photo by is my inspiration for the Project Spectrum Challenge on flickr. For the challenge this year there are 4 color combos each based on one of the four elements fire, earth, water, and air. Each element gets two months so everyone can have a chance to finish. Most of the group are knitters but there are no limits to media just color/concept so I figure there is room for some Shibori. First up is Fire using Red, Orange, Yellow and Pink . I totally love this kind of challenge, open ended, lots of room for interpretation just fun. I will try something a bit more ambitious than I've done in awhile, designing two coordinating fabrics for a particular sewing project...probably a garment. I feel fairly confident about dyeing. However this will require a larger piece of fabric than I've attempted before and that always creates a few challenges. I am less confident about the construction part, I haven't sewed a garment in a while. But I'm getting ahead of myself... I think it will be fun to take part and I encourage everyone out there to join in with their own fire inspired projects!

Monday, February 4, 2008

Itajime dyeing


I’ve been asked by a couple of people what I meant by “three tones of Navy” in my last post and for some details on how the dye was applied to the itajime piece. I had some trouble photographing the process in a way that showed anything because the dye is so dark and the clamping system obscures how the dye is taking to the fabric, so I’m gonna use diagrams instead.
With this project I was aiming to dye the fabric an indigo blue so very little white was left. Procion dyes are fairly strong and I wanted the design to be as dynamic as possible even though I was only using one color. Using a single color in such a heavy application would most likely come out looking something like this: large blocks of color with very little fluctuation of tone, not very interesting…
So I opted to use the Navy color in three strengths.
I started with 3c of a dark navy solution ( 20gm>1c),then I took 1c of that and added 1c of water to create a half tone(10gm>1c),
then 1c of the half tone and added 1c water to create a quarter tone (5gm>1c);
Once I had the three tones of dye I dipped areas of the folded fabric into them
2 corners into the lightest
1 corner into the mid
then I went back over the areas I had dyed with the light tones and applied the darkest color with a sponge brush on top or overlapping (here all three edges of the triangle)
The difference in the fabric's wetness and the way the lighter colors dilute the darker dye helps to create a more dynamic pattern

Wednesday, January 30, 2008

Itajime Shibori Process


I’ve been working on a commission of 4 coordinating pieces of Itajime Shibori on cotton.
Itajime Shibori is created by pleating, folding, clamping and dyeing the fabric and it can be used to create really lovely repeat patterns. I often use the technique on rice paper for my own digital projects. It’s amazing the variety of patterns that can be achieved with this form of shibori and it’s really fun to do.
I work on pre-scoured and dried cotton sheeting for this type of shibori.
For this set of patterns I used three different folding methods, all started by pleating and pressing the fabric accordion style.
Each pleat is pressed down as it is made.
For the first two I took the pleated strip of fabric and folded it into a series of right triangles each stacked on top of the others, pressing each fold as it is made.
The third was folded into a stack of squares using the same pressing method.
The fourth is a bit different because I pleated it diagonally then folded it into a larger square stack.
Once the fabric was folded into stacks it was tightly clamped using thick card stock and squeezy clamps. Creating neatly pressed stacks of fabric gives each area of exposed fabric equal access to the dye once it is clamped so I’m really careful to take time to fold and press neatly (unless I want an uneven result).
Next the dyes are applied to the exposed areas by dipping or painting using an activated dye solution. I used three densities of navy blue, I wanted a dark pattern but I find that using three densities creates a more dynamic look. These are the resulting patterns.
These two are the Triangular folds
This is the Square foldAnd this is the Diagonal pleat

I really like the variety I got in this batch.

Thursday, January 24, 2008

The Spool Experiment

I’ve wanted to try this experiment for awhile now. This piece of shibori was created by using a plastic sewing thread spool as part of the resist. To create it I folded a square of fabric into quarters and took a stitch at the center, I threaded the needle through the center of the spool and used pliers to pull it out. (I used a cotton gauze fabric, anything thicker wouldn’t have fit) Once it was threaded through I flipped the spool over and pressed the fabric down around the out side of the spool. I spread it as evenly as I could around the spool, trying to open the folds so all surfaces of the fabric would be equally exposed to the dye. I then wrapped waxed cord around it tightly to bind it to the spool.


After it was securely bound I dyed it using an activated dye solution sprayed onto the exposed fabric. The result was pretty much what I had hoped for. A central dot is the bit that stuck out of the end of the spool surrounded by three distinct bands: plain white (inside spool), solid (top of spool), and a band that shows the tied resist. I would like the three areas to be more distinct than they turned out to be, the dye didn’t penetrate as well as I had hoped it would. I also got a more diamond shaped motif than I thought I would probably because the fabric was folded in quarters before it was passed though the spool. I decided to try it again using fabric not folded into quarters to see if I could get a more circular motif and more even penetration into the fabric with the dye. I also used plastic zips to try to create a more substantial resist hoping that I could apply the dye more heavily to get a solid area. This was only partially successful, I did get the solid band but I like the wrapped resist on the first one better. And it appears that the diamond shape is here to stay!
I’ve been trying to figure out what type of shibori this is Oboshi or Arashi, it has things in common with both forms but isn’t strictly either. Oboshi uses a core to create a resist but it is used in conjunction with stitching, Arashi would describe the wrapping I used here to a point but I didn’t compress the fabric (good idea for another experiment! Mini Arashi!). It is similar to umbrella dyeing too.
I don’t quite know what to do with this but I like some of its qualities and I can think of many other things to try from here…I enjoy how one little experiment can open up so many new ideas in your brain.

Tuesday, January 22, 2008

Links, Books and Blogs

Ok so as promised here are some links...

Directions for dye methods:
http://www.dharmatrading.com/html/eng/529106-AA.shtml
http://www.mendels.com/dye_squeeze.html
http://www.mendels.com/dye_vat.html
ftp://gdead.berkeley.edu/pub/gdead/miscellaneous/how.to.dye
http://www.mendels.com/mxinstructions.html

Supplies online:
http://www.truetiedye.com/freeTraditionsICWS/index.cfm?ID=8E2351A1-B965-441F-87BC3B377E5BA46D
http://www.mendels.com/tiedye.shtml

Books, the first three of these I own and recommend the others I would like to get:
Dyes and Paints A Hands on Guide to Coloring Fabric - Elin Noble
Color By Accident Low Water Immersion Dyeing - Ann Johnston
Dye Painting - Ann Johnston
Shibori - Yoshiko Iwamoto Wada
Color on Cloth - Ruth Issett
Shibori the Art of Fabric Tyeing Folding Pleating and Dyeing - Elfriede Moller
Shibori Creating Color and Texture on Silk - Karren K. Britto

and finally some Blogs that feature good dye info and/or inspiration:
http://fibercopia.wordpress.com/
http://entwinements.com/blog-mt3/
http://shiborigirl.wordpress.com/
http://narablog.com/
http://fabricdyeing101.blogspot.com/
http://origidij.blogspot.com/2008/01/hnad-dyed-silk-and-more-sunset-forest.html
http://fibermania.blogspot.com/2007/09/return-to-sewing-machine-beach-grasses.html

Only the tip of the iceburg, there is a great deal more out there but these will probably be fun to check out!

Monday, January 21, 2008

Method 3 Vat Dying*


Prescour fiber
Create dye solution and submerge fabric into it thus creating the resist
Activate the dye solution and allow chemical reaction to occur
Remove excess dye solution
* Please note these are not detailed instructions for these methods just an outline. I will provide some links to places to find some more detailed instructions and more good stuff a bit later


This is the method used to create everything from a solid color to marbleized patterns. The variables here are how tightly the fabric is packed into the dye bath and how much it is moved around in there. Loose/ lots of movement = even/ solid color. Tight/ little movement = uneven/ variable color.
The next post will cover books and links that I like as well as some good sources for supplies.

Method 2 Activated Dye*


Prescour fiber and dry it**
Create resist patterns
Create dye solution and activate it
Apply activated dye solution to fiber, and allow chemical reaction to occur
Remove excess dye solution from fiber

* Please note these are not detailed instructions for these methods just an outline. I will provide some links to places to find some more detailed instructions and more good stuff a bit later
**drying the fiber is optional

This is the method I use for Shibori where I am interested in creating a strong resist effect and preserving contrast. Dye is more likely to stay where it is applied than in the soda soak method partly because of the lack of liquid in the fabric and partly because of the wicking factor. This process can be repeated on the same piece of fabric with new layers of resist being added over the old ones too. I don’t do much batik (love the effect hate the wax removal) but if I did this is the one I’d use for it. I also use this for dip dying fabric and print paste mix made with thickener. The limitation here is the time factor once you’ve created the dye solution and activated it the clock is ticking and you have to be aware of that.